Saturday 17 December 2022

Jeans with Holes

 How to fix ripping jeans. With regular patching they'd probably stop being my favourite. But this way, I like them even more. I put a turquois canvas under, sewed around the hole and cut the ripped edges off.

Wednesday 2 November 2022

Halloween Pumpkin Lantern

 I bought a little pumpkin for Halloween lantern.

Carving the lid was easy - each cut is at the width of the knife blade. The intestines were removed with a spoon.

I started to draw a face with marker, but realized it's not necessary. The face was shaping itself as I carved.

This is my little demon.

Ending this day with a nice horror movie before sleep :-)

Wood Spatula

My fiance is going to cook for their company staff as a teambuilding activity and I have a surprise for him. I carved this writing on my spatula and I will put it into his bag with other things.
I used small carving knife and very simple font made only of straight lines.

Tuesday 11 October 2022

Khaki Beshmet

I have just finished my last piece of garment for my Cossack order (thanks god :-D).
This time it is a khaki Beshmet.
I could choose the design of the eyelets and buttons, so this time I chose a subtle natural cord and little brass buttons.
At the sleeves fastening, I never cut the fabric, I always extended a gap between the canvas threads with a round pricker, inserted it and sewed on the upper fabric. When I had all the eyelets, I sewed through the lining, cord and the khaki canvas once again to attach all the layers together and make it more sturdy.
I hope he will like it :-)

Friday 9 September 2022

Blue Beshmet

Second beshmet has extra long sleeves ended with a flip.
This sleeve ending was taken from a photo of original piece.
I prepared the flips, cut the edges to a few milimeters and ironed the seam allowances.
I turned them over, sewed through the edges and cut them to the same height according to my template.
For the eyelets, I used a stronger cord, so I had a hard time putting it through the fabric. I enlarged a hole between the threads and covered the tip of the cord with pattern paper for easier pull through. The eyelets are then sewn together, to the upper fabric and finally through all the layers.
I ordered two types of button, for this color of beshmet I chose the silver big ones.
Here is an illustration of how important ironing is. Lining before and after ironing: some strange pieces put together vs. one piece.
Finished.

Monday 15 August 2022

Manicure Case

Mummy asked for a new case for her manicure scissors, so I picked some fabrics that I love and started quilting.
I made two lines of stitches around the edges of both pieces. I cut the upper edge of the small piece to one milimeter and hemmed with a bias tape that I cut and ironed from some leftover.
I pinned both pieces together and sewed them in the edges.
Hemming the outside. I measured the bias tape and joined it in a circle.
Pinning the bias tape on both the front and the back side before sewing.
I sewed on a snap button and a few sequins.

Tuesday 1 March 2022

Blue Circassian Coat - Finished

The length of the coat is done in the last phase. I left one panel free so that I was able to get inside and sew all other lower edges of lining and coat together. Then I repeated sewing in the golden trimming so that the lower edge would remain folded.
I hand-stitched the last panel. I have ironed the coat before sewing the lower edge, so now I am trying to keep it on the sewing dummy as much as possible.
Ironing the lower edge, removing the basting and ironing the lining fold.
I ironed the sleeve - I had to press on the right side, so I used a piece of cloth not to leave iron marks on there.
The sleeve is caught only with a few stitches at the seam.
I measured the hooks and eyes for the closure. When I sew, the hook/eye is always aligned with the edge.
The hooks/eyes at the very top and bottom are sewn once again through all layers.
I cannot believe it. It is really finally done.
I love the trimming.

Tuesday 22 February 2022

Blue Circassian Coat - Sleeves & Gold Trimming

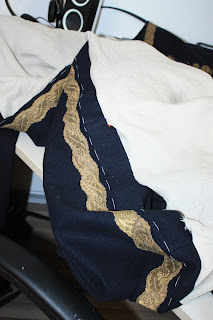
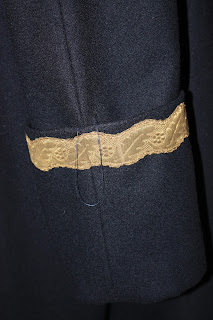
I cut out the sleeves. I placed the trimming half a centimeter from the edge and sewed on.
The upper sleeve is contstructed from one piece this time. The original sleeve pattern, then 20 cm mirrored, and 23 cm mirrored back (the lining piece is 3 cm shorter so that the lining would not be visible at the end).
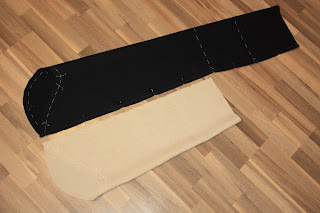
I prepared the sleeves with lining - I sewed each sleeve alone and then sewed them together.
I added a line of stitches through trimming and woolen sleeve again to keep the edge folded in place.
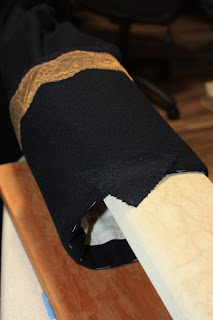
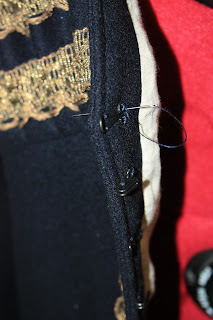
I pinned the sleeves together, cut the woolen one to 1 cm seam allowance, leaving at least half a centimeter longer lining piece.
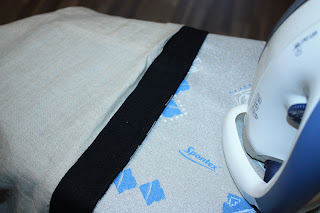
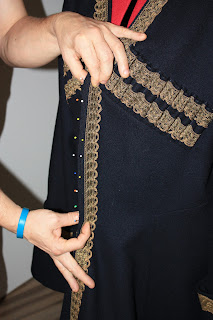
Lower edge of the coat is trimmed as well. Then I prepared the corners the way I did with the previous coat.
I basted the sleeves and I decided to slightly adjust the pattern for better fitting.
Woolen sleeves are basted and sewn in first. The body is turned over to wrong side, while the sleeve remains at its right side.
Then inserting the lining sleeves seems like a gynecologic operation. Very few place to sew in, chaotic mass of twisted fabric everywhere... At least no basting - the inner sleeves are not so important as for the looks.
Finally pressing the armhole seam allowances towards the sleeve and turning the coat back to the right side.
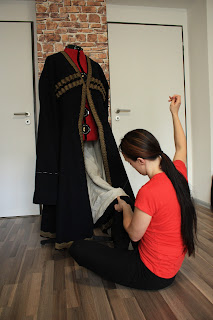
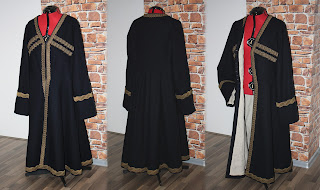
Sleeves are finished.

Sunday 6 February 2022

Blue Circassian Coat - Lining

I ironed the linen, folded in half and drew the pattern.
This is the center front. The hemming is 1+3+1 cm wide, so I have to substract 3 cm and add one back for the seam allowance. Other seam allowances are always 1 cm.
I sewed the lining pieces together.
I sewed the lining and woolen bodies together at the front edge. I stopped in half the lower hem width.
This is the joining between the sewn on and left center front hemming pieces.
I tried to press the lining with my nails.
However, there were some places that would not be nice without iron and I found a few mistakes along the way...
This is what such a mistake looks from the right side...
... and this is the cause visible from the wrong side.
So some extra time needed for fixing the bugs :-)