My cousin saw my tarot case and wanted me to make her one too. I agreed but as she's a great artist, I wanted her to cooperate, to do some work on it too.
She sent me the measurements. I create a pattern - I added a few millimeters to each side for ease of handling and some for the thickness of the material. I also added a bit in the place where the leather would be folded.
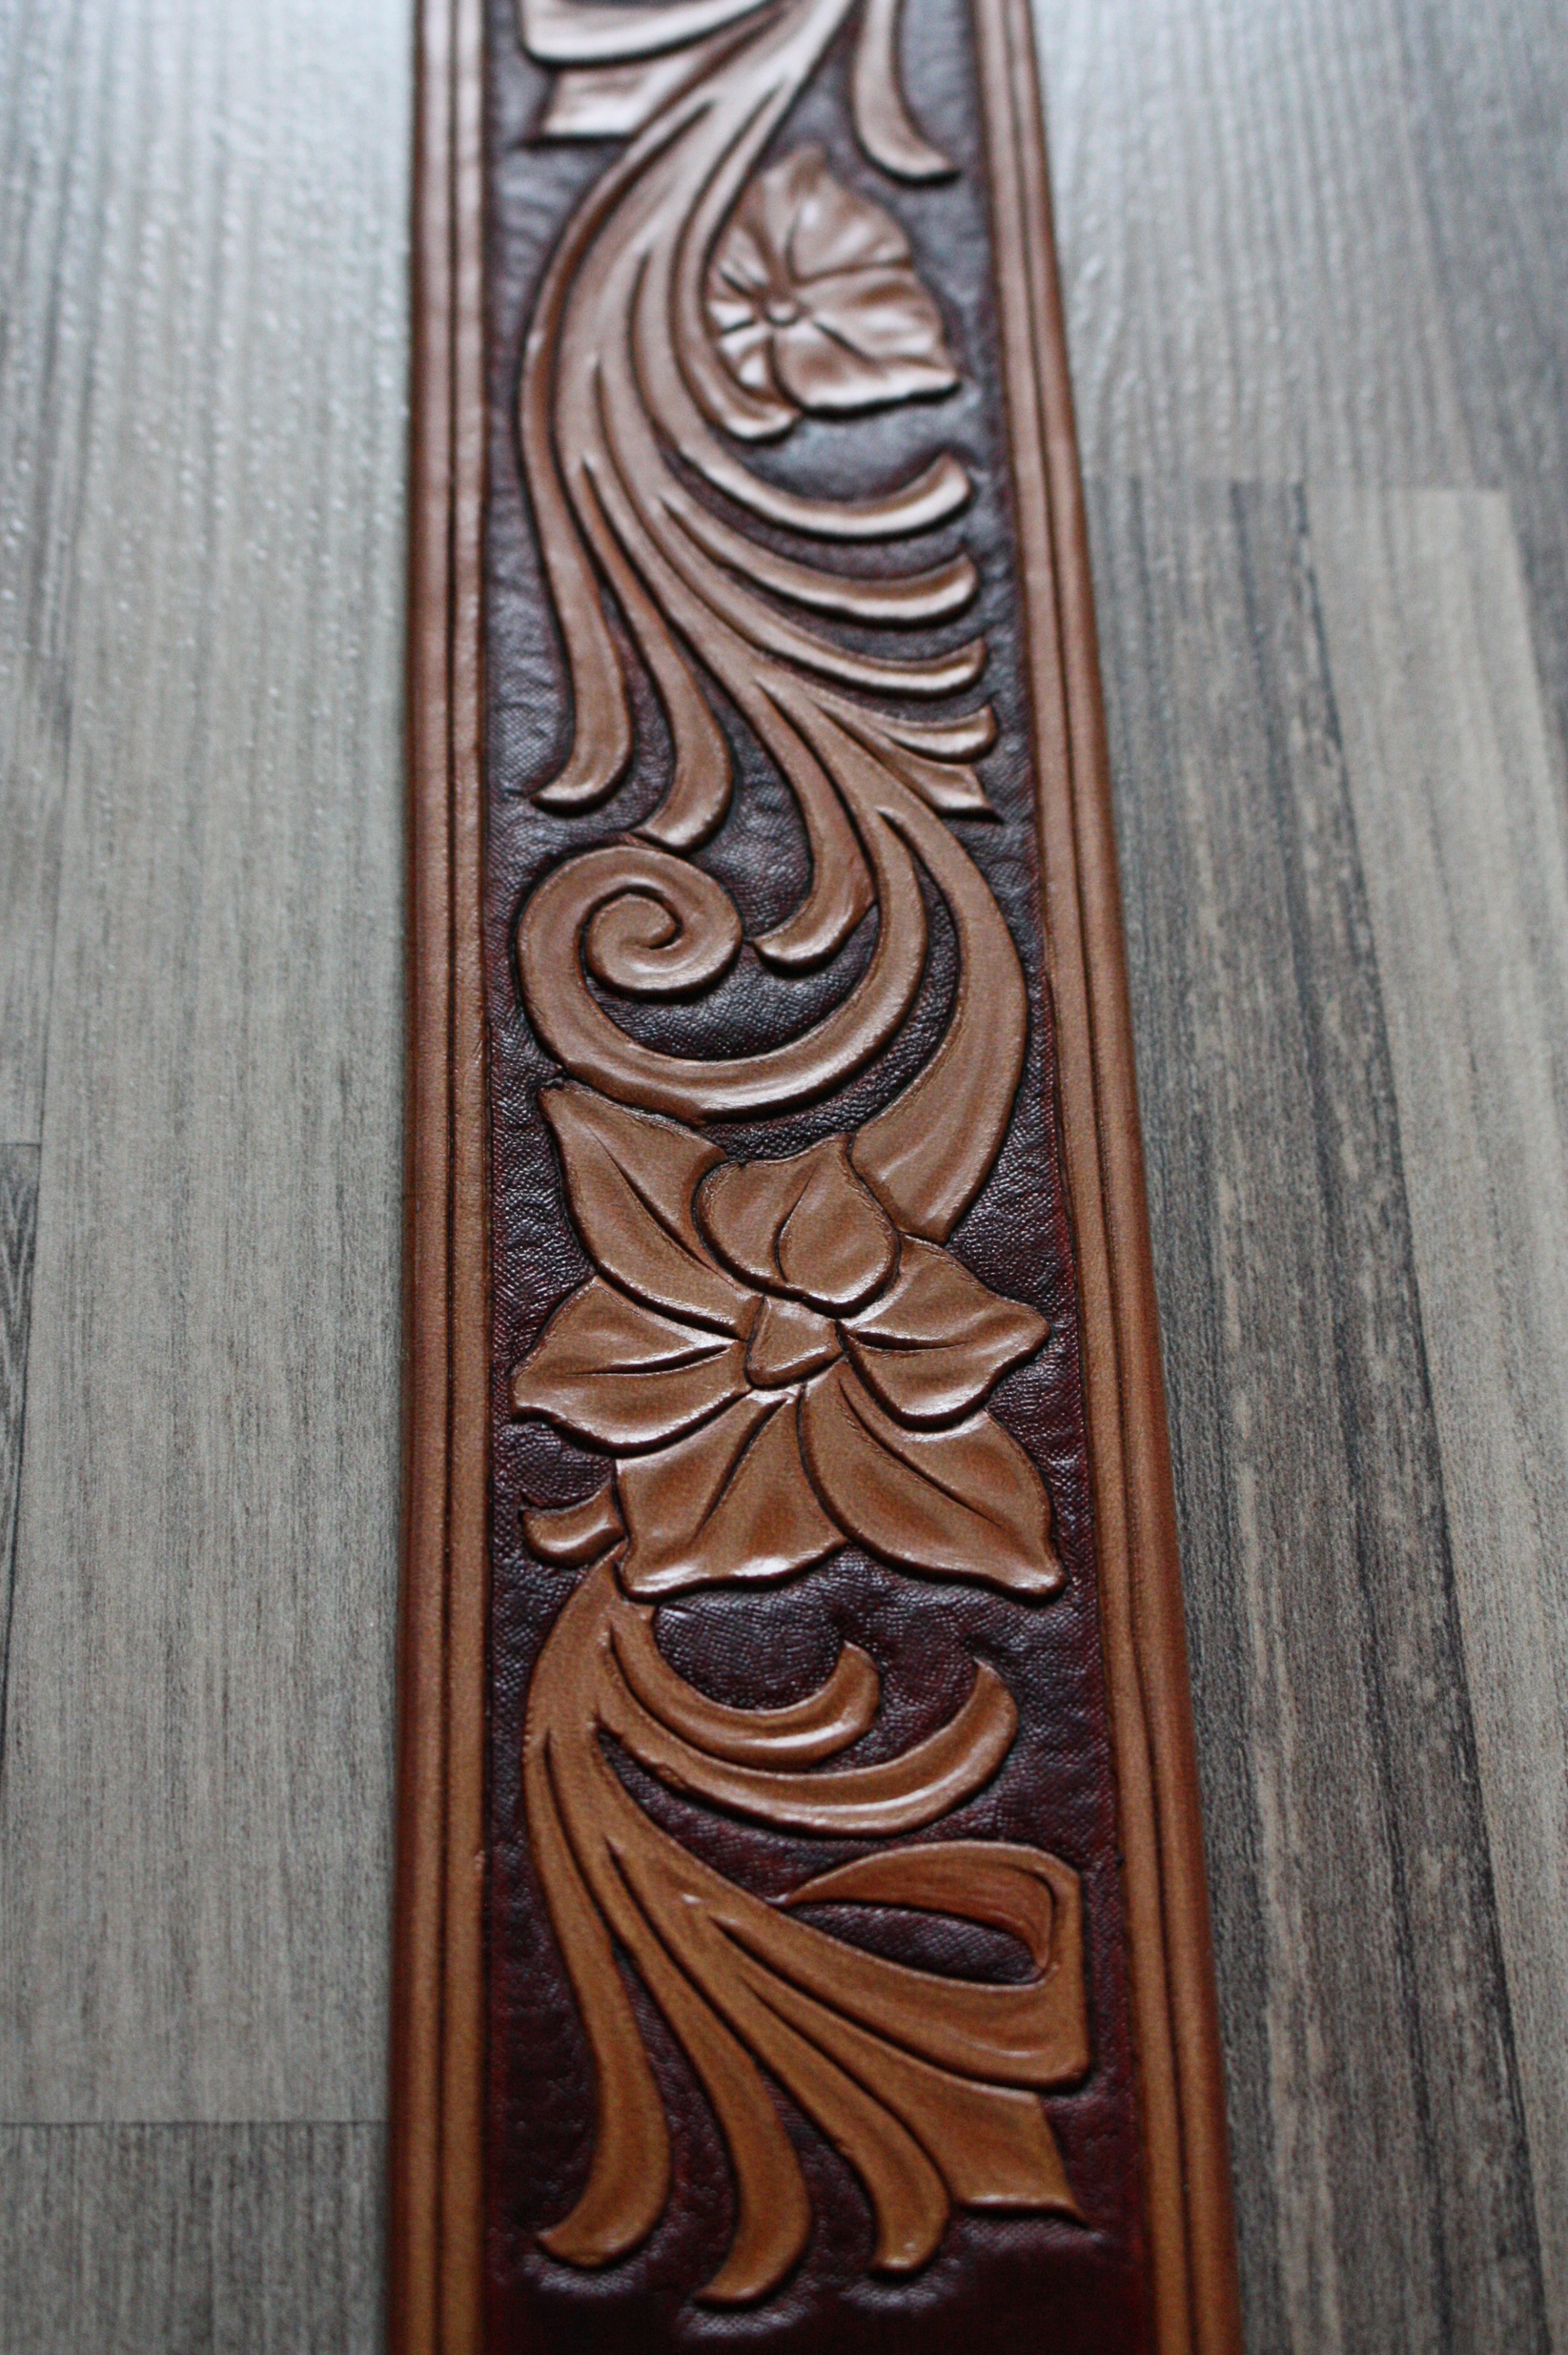
Like this I cut the main piece, did some basic outline with a dull needle on wet surface and sent it to her to decorate the lid. She did it with a dremmel tool.
For rounding the corners I used this ingenious ruler. I traced it with an awl and cut with a scalpel.
First two tries of the side piece were done like this - I punched all the holes vertically and then made a slanted hole with the awl to end at the corner.
This creates an irregular edge, so it is straightened with a scalpel again.
When I tried for the first time, I was working with the awl for too long time. It's hard work for a girl and using so much strength for long time takes away the sensitivity of fingers - I pushed too hard and tore one hole.
Second try - I was more cautious. I took pauses so all my holes were fine. Just when I wanted to sew... I found out it's too short! I was doing the holes in a row, just as the punch tool leaded me. I thought that if I had the right number of holes, it would do. Unfortunately not.
So for the third try, I carefully transferred and marked a few points from the front and back pieces. Especially at the round corners, the holes need to be more apart.
And I also didn't punch the holes through, I just marked the spots and the pricking was done completely with the awl. To make it easier, I cut a slit to the wooden base to fit the tip of the awl in.

All the edges were cut to round shape and wet smoothened.
Some edges should be rounded just at one side - I used the rear part of scalpel to do it.
By the way, now each time I cut the edges, I sharpen the tool with a sandpaper in advance.
I cut the fastening piece, made holes, soaked in water and shaped.
And now another thing that was thrown away in the process... For shaping, I wanted somenthing to put in, to support the case when drying. I made a false deck from bottle of milk. But in the end it didn't fit in as it missed the round corners.
Whatever. Drying without support was just fine. I watered the leater, especially at the places where it should bend. I traced the lines with the modelling tool at the wrong side.
Then I made the same mistake as last time :-D I didn't count with extra layer for the front piece. It fits so nice without it...

Nevermind, fixed it and let dry under my husband's flight award.
When the shaping was finished, I got down to dyeing. I mixed violet and brown alcohol-based dyes. I applied the dye with a woolen ball - one layer to cover each side and then immediately once again go over the same area to get a united color. Wearing gloves is essential.
The color was really strange. Mysterious. Very brown but the violet was there peaking.
There were even goldish reflections. My husband called this a tarot color :-)
When the dye was dry, I wiped off the excess with a cloth and applied a coat of resolene to get it water-repellent. I put a tape to a place where glue should come. Then I made balls from a napkin in a sock. I soaked it in resolene and used to transfer to leather in generous amount. It dries quickly, so you must be fast. Then I wiped it once again with dry cloth to make it shine a bit.
The color changed. Wiping the excess of dye removed the goldish layer and resolene made the color a lot darker.
I glued the fastening on with Herkules. I used needles to make sure the pieces would end up on the right place.
After sewing the fastening on, I tied the knots and hammered down to flatten them. I put a scrap piece of leather below so that the leather does not get stamped.
I sewed the seams like usually, with two needles and a pair of pliers. I started with two stitches and went on with cross stitch.
The ending knot was again flattened down so that it wouldn't damage the cards and the ends glued to stay in place.
Sewing the last seam was not as hard as I was afraid. I made each cross a bit loose. I opened a slot between the pieces for the needle. When I made the next cross, I fastened the previous one.
Finished case.
And final relief when she confirmed that the cards fit in! :-)