Sunday 18 December 2011

Spiral Poi - Finished

I did some little changes compared to the previous production.
I don't make a hole at the top, because my pair tore off at the point when I was spinning hard. It weakened the thinniest place at the poi. Now I just fold the top over a metal rectangle and I sew the handles to it.
And I decided not to embroider the upper hem of the sack with always the same stitch, when my Janome 7700 knows a lot of wonderful stitches. I'll chose it to match the picture on the sack :)
The poi pattern's just amazing :-)

Saturday 17 December 2011

Spiral Poi

Again, again, again. I always end up admiring my customers' designs. This one is really cool :-)
Making a pattern meant precise measuring. The spiral always ends up at the right side and it must begin exactly at the same height and width on the left side.

I cut out all of the pieces and drew the pattern on the base two pieces.

I sewed the spiral pieces on with a satin stitch, I attached them to the base with straight stitch. The straight stitch must be close enough to the edge so that it wouldn't be visible after sewing the poi together.

I serged the lower edge and  ten centimeters of the side seam allowance. I marked the lower fold line and started sewing the poi together at the side seam. I didn't sew under the fold line to leave a gap for the cord.

I had to pin each satin line. The lines must connect exactly at the width of the seam allowance to make an impression of a continuous piece.

I folded the slit in and sewed to keep it in place.

When I folded the lower hem, I had to alternate the thread colours for the stitches not to be visible. I always prefer to have sleeve shaped things wrong side out when sewing the lower hem:-)

Are you curious what they'll look like when turned over?
So am I :-D

Sunday 16 October 2011

Woolen Trousers and Tunic - Finished

I hemmed the lower edge of the calf pieces and gathered the knee of the trousers.

The gathering: I sewed two lines of long stitches and pulled the lower thread.

I sewed between these two lines and then ripped out just the line of gathering stitches that was visible at the right side.

The completed trousers:-)

I serged the neckline lining, ironed it to the wrong side and sewed on the place. I ironed it on the wrong side so that the edges wouldn't mark to the right side.

I had to insert small gores to the armcye. I sewed them to the sleeves first.

Then I sewed the sleeves to the body. Then I sewed the sleeve and side in one step.

I like sewing over the seam allowance when I hem the sleeve - it's locked where it should stay:-)

I folded and hemmed the lower edge and the tunic is here :-)

Saturday 15 October 2011

Woolen Trousers and Tunic

This is a quick business - I must make the costume (trousers and tunic) during this weekend.  
I cut out two very wide legs and sewed the thigh parts. I sewed the center seam and made a tunnel for the fastening cord. I left out a hole in the center seam for the cord.  
I measured the upper and lower circumference of the calf, drew a trapezoid and curved the vertical lines.
 
I sewed the vertical seams. Now I had the thigh and calf parts prepared.
 
I drew the basic pattern for the tunic. It depends on the breast, butt and length measures. 
 
I placed a raw piece of fabric on the neckline and sewed along the line. Then I measured four centimeters from the stitches and cut off the excess. 
 
I sewed the sleeve to the armcye before sewing the side seams.

Friday 9 September 2011

Wood Carving - Name

I'm carving our dog's nameo.
The best wood I could get was a kitchen knife board.
I started with the center lines. They are deepest spot of the writing.
When I carved the diagonals I put the chisel slanted to go from the full depth at the center to the zero at the edge.
When I had the lines I got down to the surfaces.
I don't have my chisels perfectly sharp so I always cut perpendicularly to the threads (which is not this case, I found out that by experience in the middle of work :-D).
I didn't have the right gouge so I had to do the curves with a corner of the chisel.
Not very elegant.
The inside is also done with the chisel...
And the gouge is eventually here! For the curved outside part.
I hate the O.
The writing took me two days. Not finished yet :)

Tuesday 19 July 2011

Black&White Poi

Four pieces poi. In chess colours.
I sewed four black+white pairs, at two of them I left out a place for the lacing.
Then I put each two pairs together. I ironed the seam allowance to the right and the left edge as well. I wouldn't be able to iron it properly after sewing...
When I sewed the tunnel for the cord, I had to change the thread colour at every seam :)
I sewed the upper edges together and I turned the poi over with the help of a knitting needle.
The owner's nick is QMax, so I used the initials as a picture :-)

Friday 1 July 2011

Tent

I and my boyfriend have been making a tent for larps recently.
He cut and sewed the base and I acted as a technologist and I made the loops and fastening. And as far as the accessories, he made the poles and I supplied us with the cords.

I love it, it's so spacious! I'm looking forward to our first night inside:-)

Thursday 26 May 2011

Orange Dress - Done

The only thing left for today is the fastening. I used dark metal grommets. I put them as far from the slit as possible, they just touch the serging stitches.
The orange dress has two centimeters larger neckline than the petticoat and its shorter so that one could see both of the dresses.
I love the design, my customer made it up herself.

Tuesday 24 May 2011

Orange Dress - Almost Finished

I pinned the sleeves with right sides together. I drew the cap and cut both at a time.
I basted the sleeves to the garment body and sewed. You can see the waves at the shoulder - the sleeve should be slightly gathered at the upper part to fit the arm well, but no wrinkles are allowed!
The dress is almost finished, the only ugly thing is the lower hem. I marked the length at the fitting with pins.
I pinned the lower part symmetrically, drew two nice paralel lines and cut off the excess.
I serged the the lower hem, ironed it and sewed on. When you sew a circle you may lock just at one end (over the first line of stitches).

Sunday 22 May 2011

Orange Dress - Progress

I had most of the dress sewn, so I got down to serging.
At the gores, I folded the tip inwards so that I could serge the gore's seam allowance together with the dress' one.
At the fastening (front), I couldn't fold the tip inwards because it would be visible at the slit. I serged it and then folded outwards and overcasted with hand stitches.
I ironed fusible web on the edges of fastening and folded inwards several times. It should be as stiff as possible (the bodice shouldn't wrinkle when you lace it up tight) and I wouldn't have to serge it.
I made the lining piece for the neckline, ironed fusible web, serged and marked the line for stitching.
I laid it right side to the right side of the dress and folded the fastening edges once back (I unfolded the last fold). I sewed up to the edge.
Then I could turn it over, iron and sew a line of decorative stitches to catch the lining piece.
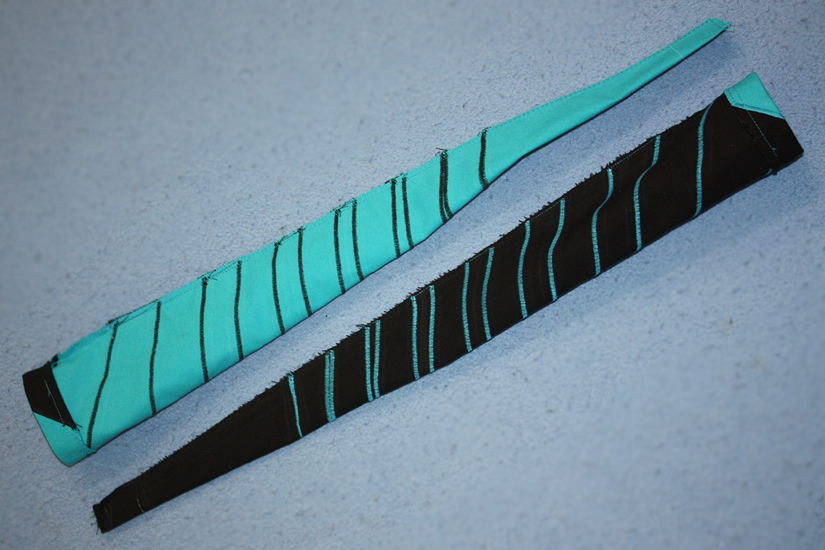
I didn't know how to serge a slit with open seam allowances. I found out it was so easy! You just cut the slit as far that it's as wide as your serge stitches when you press it open.
By the way, this is the elbow slit - it's not horizontal as the petticoat's one. I made it vertical so that it could serve as the base for the arm lacing (slit).
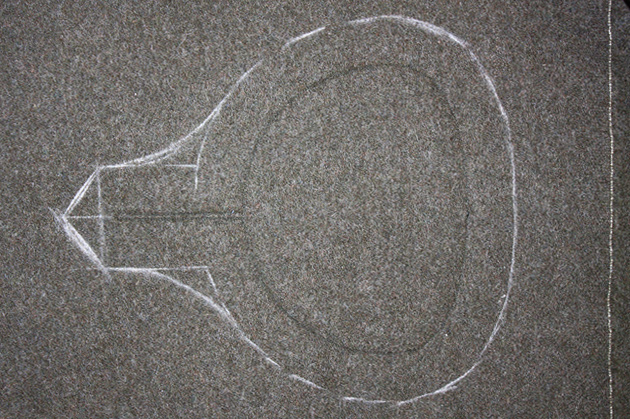
I use this way to sew a corner. I mark the place where the edges will meet. Then I draw a perpendicular to the basting. I join the point where this line meets the edge with the corner.
This is what I get.
I sewed it exactly at the bias lines and cut the excess off.
This way you can get neat flat corners:-)
I drew the line for the decorative stitches. I sewed along the lower edge, along the slit, through the drawn V and back to the lower edge. I sew at the serging line to attach the lining pieces.