Thursday, 24 October 2013

Belly Dance in Blue&Brown - Covering the Cups

I feel like making myself a new bellydance costume. I believe I've learnt my lesson from the last attempt and I will only use stretch fabrics for covering the bra :-]
 The pattern. I put the lovely blue fabric on the cup and pinned it on, eliminating every wrinkle by stretching it, mainly diagonally. Then I cut it out leaving a 1.5cm seam allowance. I cut the other half symmetrically. The result should resemble a rectangle more than circle...
 I pinned it on again. Those who are not lazy can baste the right side at the edges - it simplifies the work a lot.
 I folded the seam allowance in a half and carefully attached it to the bra. It's ok to pull a bit to keep it smooth.
 Just tiny little stitches. If you baste it, you can get rid of the pins.
Around the cups, I sewed tiny back stitches.
 You can see the brown fabric too - it's tie-dyed and has some blue spots :)
The center is probably the hardest part. Not much space to manipulate...

Monday, 21 October 2013

Machine embroidered patch

I wanted to make a logo of the company I work at.
 I printed it out several times. I put it onto the fabric and sewed with a narrow zigzag stitch through both the paper and the fabric layers. This way I could get the right shape and proportions of the logo.
 The stitches are so close to each other that the paper can be easily torn out.


Sunday, 26 May 2013

Machine Decorated Sacks and a Guitar Strap

I'm at the last year of the bachelor studies and I'm procrastinating from learning to the final exams by sewing :-)
I'm having fun discovering the decorative stitches on my beloved Janome Horizon.
The smaller sack has a motto that means a lot to me as I have trouble doing the same routines every day - mainly spending my time on the computer...
Anyway, I gave it to one of my best friends.
The other sack is meant for my breakfast honey rings, that I usually take from home to where I study.
I just hate plastic bags.
I embroidered the rectangle and sewed a sack from it. Then I flattened it so that the bottom and side seam would be one on another and sewed and clipped the corner - the bottom is wider this way.
Oh, how I love the stitches :-) Especially on the linen fabric...
This time I used a decorative stitch even for the fastening.
Today I made a guitar strap as well. I found out our guitar has no knob at the bottom so it had to be the one with a hook.
I reused a hook from bungee cords I bought for my bike.
I attached the polyester band to it with screws. To protect the wood from scratches I glued a piece of band inside the hook - I used double sided tape.

Tuesday, 19 March 2013

A Man Sunbathing With His Pet

You know, when it comes to a snowman, it doesn't mean the same thing for me as for most people...
I just don't like making balls, I'm not good at it.
At first, I wanted him to hold a puppy, but then I thought almost everyone has a pet dog.
I prefer imagination. When I shape the body, I feel like stroking the real body. That's what makes the right profile easier to achieve :-)

Saturday, 9 March 2013

Female Leather Armor

This piece was meant to be unisex - sewn for a couple who would spare it.
They broke up before it was completed and I adjusted it to the female half :-(
At the beginning, the side seam was curved like at normal dresses. Then we agreed I should make it thinner. To my surprise, a plain straight line fits the best! The main shape was in the center back seam.
I used my favourite pattern for the fastener bands - I call it a shamrock :)

Saturday, 2 March 2013

Renaissance Dress - Finished

The dress has a little sweep (only about 10 cm) that gives the skirt part a nice silhouette from the side view, mainly when walking :-)
The upper tubes at the sleeve would lay flat if I hadn't sew the center one right to the shoulder part of the corset. These sleeves are so arduous to make...

What could I do better next time?
The petticoat sleeves are just about 20 centimeters longer than hands. Far more would be ideal, at least for such lightweight fabric. The tubes need petty's support to form nice archs.
She's so beautiful :-)

Sunday, 7 October 2012

Brown Fiertoch

This is a part of a traditional folk costume from Spytihněv (south Moravia). Fiertoch is the topmost layer of the skirt. It is tied around the waist like an apron.
My niece has chosen beatiful brown&gold brocade. I sewed a stripe long about three meters from stiff fabric, ironed the three edges of a brocade rectangle and sewed it on.
Then I spent about 8 hours handstitching a spangle band to the brocade. I watch TV when doing things like this, not to get crazy :-D
The band must be neat even at the wrong side. Folkers are perfectionists when it comes to their costume...
I gathered the upper and lower part. I did it in hand, but at the waist I machine sewed an auxiliary line of stitches which helped me keep the length of gathering stitches.
You can see the process - what the fabric looks like when you just gather it without manually straightening each pleat.
Brocade frays easily so I cut the upper edge as late as I could. The gathering here was nice and accordion-like.
At the bottom, the size of stitches corresponds with the width of the pattern - I always go throung the same place of the pattern.
I love this state :-)
Here I just sewed on two connected rectangles - one from lining and one from brocade.
I always wonder if I should sew it on by machine, the gathering is at least 5 mm tall... But usually I get surprised by how easy it is.
I sewed the lining to the back in hand. What's left now: sewing a white ribbon to the sides as a fastening and leave like this for at least a week. The gathering stitches are always taken out right before one takes it on to preserve the desired accordion shape.
So this is one little piece of the million-pieces Spytihněv folklore dress. Luckily, the rest is not my business :-D

Sunday, 9 September 2012

Renaissance Dress - Sleeves

I cut all the pieces for the sleeves. It seems like a few but takes a lot of time.
I toughtened all of the edges with a fusible web (the lining too for the grommets not to rip out).
I sewed tubes, ironed to bands that I cut to small pieces. I serged a line of tubes like at the Cranach dress.
After sewing the bands to the upper edge of the lower sleeve I sewed on the lining. Carefully not to catch the side band.
I folded the lower hem and sewed on with a hidden stitch (machine). Then I sewed on the upper part of the sleeve. This time, unlike at the Cranach dress, I leave the sleeves flat as long as it's possible.
I ironed the edge aroung the bands and added a line of stitches there.
As drying is one of important phases of ironing, I let the sleeves dry in the shape I'd like it to stay in. On my hula hoop :-)
At the upper sleeves, I sewed the bands on the sleeve first and then I sewed on the lining.
I serged the sides and added a lot of grommets.
I sewed the sides together and that's all :)

Tuesday, 28 August 2012

Orange Fire Costume

I made a fireshow waistcoat for my boyfriend.
The design is from both of us - he wanted a sleeve on the right arm (he spits fire and wipes the oil from his mouth to it). I made up the rest :)

I didn't have a cord or leather thick enough, so I had to braid a thin cord and I quite like it :)

Monday, 27 August 2012

Renaissance Dress - Corset Base

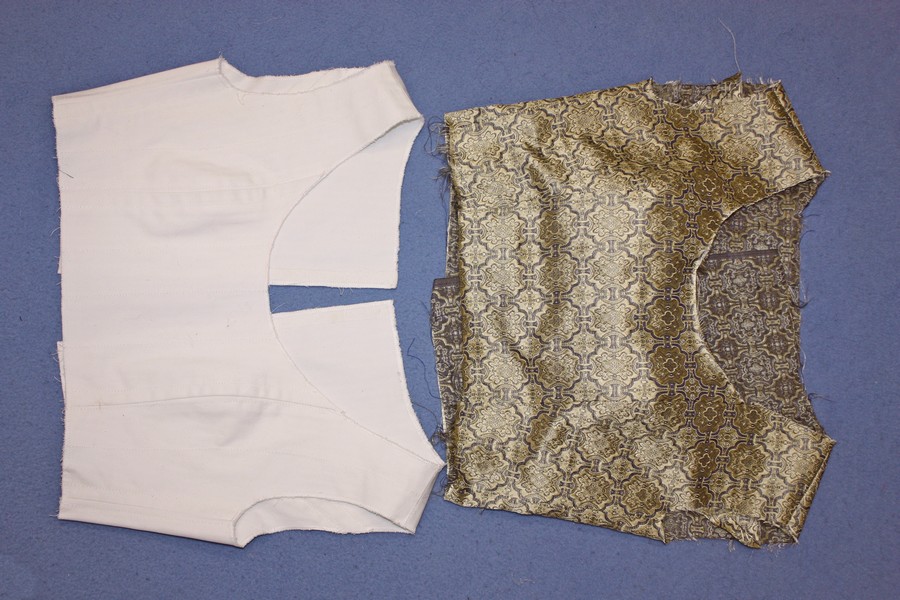
I fitted the bodice for the renaissance dress. I made a pattern for the other layers; one from canvas and one from brocade.


The second layer in progress. The first layer has wide seam allowance for the bone to fit in.


I put the two layers together and sewed them carefully at the seams.

I have prepared a pleated skirt. I has a small sweep :)
Oh, I love sweeps!


The brocade covering. I tried to match the pattern at the bust, it's not perfect, but it should do..


I cut the sleeve from the fitting and made a pattern from it.