Monday, 12 July 2010

Kiwido - Orange Finished

I had my orange kiwidos almost done.
I zig-zagged the tails and cut the threads away.

I prepared loops from a rubber cord.

I inserted them into the butts, the knot must be behind the bottleneck.
I took a double thread and gathered the bottleneck.

I wound the thread several times around the tail and made a few stitches through the rubber. Then I cut a small piece of a satin ribbon and hid this thread.

I made a pocket for each poi. I don't say pair, cause these poi will be used as single.
I cut the pattern (double layer) and marked the upper side of fastening.
I sewed there a twill ribbon with its sides folded inside. This makes a tunnel for the cord.
I sewed the two parts together and serged.

The last to do was the upper hem - I pressed it down and machine-embroidered over it.

So this is it - six fishie kiwidos.

And the pockets. I let the tails out - the kiwidos don't wrinkle this way and what's more - they look like buds in the pockets:-)

I used to dislike kiwidos (as a hard-core firelover), but today I changed my point of view.
Sometimes I just envy my clients:-DDD

Friday, 9 July 2010

Kiwido - Orange

I altered the pattern so that the bottleneck would be wider. At the yellow poi I wasn't able to turn them over and I had to rip some seams.
I did it and as a result I got a pattern that fits itself well when cut in pairs.

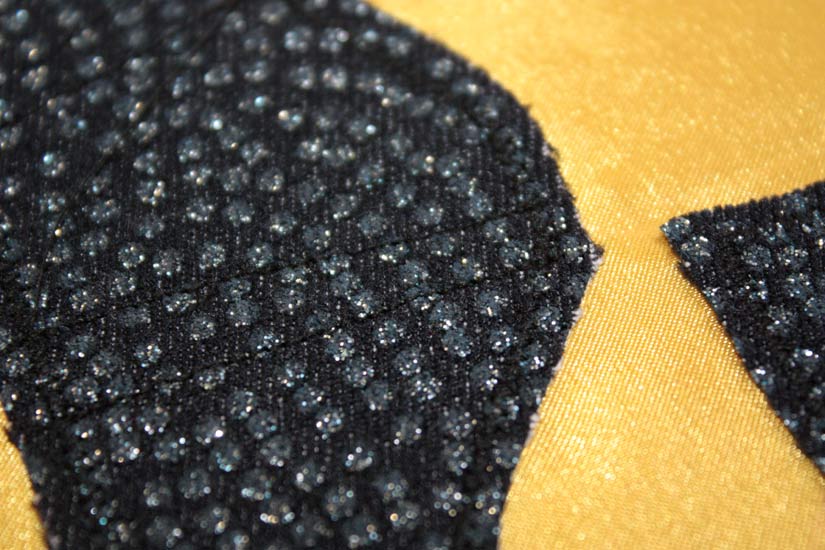
I cut the glittering fabric and decorated the satin.

I cut the fish, completed them in four, then put two and two together and pinned at always the same side.

I sewed all the fish at one side. You can see that I marked the middle at the beak so that I could start the seam exactly at the right point.

I ironed the vlieselin, basted the loop and inserted to the upper parts. The pin at the fish's mouth is good for the exact position of the seam.

I cut the seam allowance at the curved places, knotted the loops and serged the tails as at the yellow kiwidos.

Thursday, 8 July 2010

Kiwido - Yellow Carry On

Three yellow kiwidos. Should be done eventually today.
I knotted a rubber cord into a loop, inserted to the tail of a kiwido filled with sand and foam.
I gathered the fabric in the bottleneck, sewed the loop to it safely and hid under a satin ribbon.

I gathered the tail loosely with a rubber thread so that the loop wouldn't be visible.

I also made fingerloops for all six poi.This time I used as simple method as possible.

I cut a synthetic band, thawed the ends, folded to create a fingerloop and sewed by machine. I used a wide and heavy zig zag stitch (satin stitch).

And why all the rubbers?
When attaching the ribbons, they even don't need a knot, they adhere very well.

(OMG, three more poi to make, if just the nasty satin wasn't so difficult to process...)

Wednesday, 7 July 2010

Kiwido - Yellow Beginning

My new poi project. The client wanted poi for belly dancing, but not with a veil but with ribbons.
The task I got from her was the stranger the better. So I let my imagination do the job.
I made a pattern - from a pattern for four-piece ball, I prolonged it and added a tail.

I cut various pieces from a glittering denim and pinned them on the fish.

I sewed them on with a narrow satin stitch. Not exactly at the edge. I want the edges to fray out a bit.
I attached the denim pieces with a straight stitch to the seam allowances of the kiwido pieces.

I'd made a prototype and I found out that the upper part stretches unpleasantly (it bears the whole weight). So I ironed a fusible web to toughten it.
You can see that I cut it in layers - right side to right side so that I could always get two mirrored pieces.

I sewed each pair of pieces and ironed the vlieselin to the upper parts.

I prepared a loop. I basted the loop and then I basted it to the fish at a marked place.

Those of you who are cleverer than me, must have seen that I had it wrong. I sewed it wrong, ripped out and here's the right version:-) The loop basted to the right side.

Turned over and...
...yep, that's better!

I sewed the fourth seam as well. I cut the seams at the curved parts (carefully not to damage the stitches), serged the tail and knotted the ends of the loop.

I zig-zagged the tail's edge. That didn't look very neatly, but as the edge at my concept was chaotic as well, I didn't mind. I wouldn't be able to serge the edge, satin is too troublesome material.

I'm gonna eat you little kiwido fishie!:-D
(Yes, I one of the RD weirdos)

Thursday, 3 June 2010

Small Kilt - Beginning

A friend wanted me to make a scottisch skirt for him.
As it's not ment for a period event but for a LARP, I edited the concept of fastening to changeable size (his wish).
I made a pattern for a skirt. If you were interested how to do it, I can explain it.
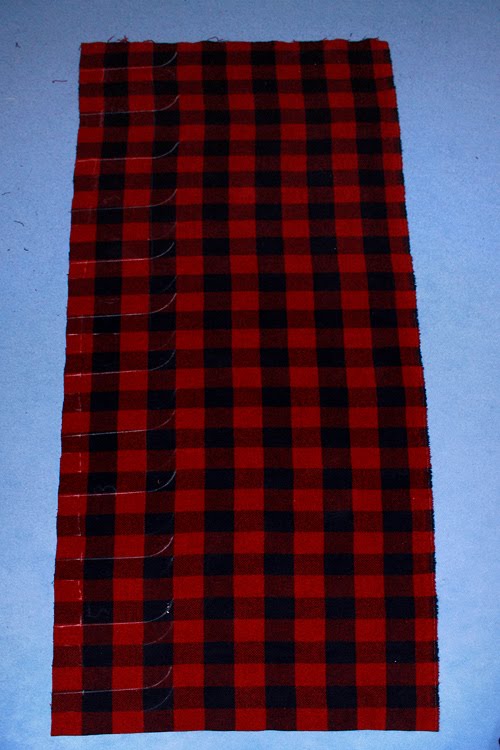
I measured that the lower part is nine sqares high and the waist part is less than three quares high. So I cut rectangles of more than twelve squares height.

I cut the pattern to two pieces, as the lower can be measured on the fabric:-)
I drew the tuck sizes on every third square.

One square free plus seam allowances on each side is perfect. I chose a method of a tuck ended with a curve and drew the lower parts this way.

I pinned and sewed each tuck. The skirt should consist of the front and back piece. Unfortunately, at the back piece the tucks were sliding when I sewed so I had to baste them.

I pressed all the tucks and folds down to the lower edge. I allways recommend ironing at the side that wouldn't be visible.

In the end I found out I can arrange several folds and press them at once :)

I machine-basted the lower hem (usind too loose upper thread) and pressed it again. From the wrong side again:-D

I basted the sides for the appointment. I drew the upper edge again from the waist pattern and basted so it would be visible at the right side. The front piece is on the left and the back piece on the right.

By the way, can you discover what mistake I made?

Friday, 30 April 2010

Cloth under the Wine Goblet

I was giving my friend a beautiful goblet. I thought it would give more the feeling of being a medieval nobleman if the goblet was standing on a velvet decorated cloth:-) I hope he'll drink of it often.

I hemmed a velvet square with a leftover of golden lace. Two rows of it.
I pinned several varieties of crosses on the cloth, but finally I decided not to make them (as little time before the birthday as always).

I chose a pearl embroidery instead. Bijou pearls and black cylindrical beads - three between every pearl section.

I didn't want to make a lining. However, I didn't want the embroidery long threads to be visible at the wrong side. So I brought the needle inside the fabric bethween each bead or pearl.

The goblet's so nice!

Sunday, 25 April 2010

Trousers No. 3 and 4

The same pattern and similar routing. The pattern consists from the left and right leg.
I had to make two pieces. One was no problem. I eventually start liking sewing pants:-)
The other owner-to-be gave me a piece of linen bed sheet or whatever with a seam in the center, so I had to work with two quite narrow rectangles. I decided to leave out the poined parts and insert a gore instead. This way I was able to use his fabric.
I cut these parts in the same height at the knee and both 8 centimeters from the upper middle.

I drew half a gore according to the piece from the front side and added the back side, seam line in the middle.

I sewed the gores to the front parts of the legs. The seam allowances are pressed to the sides (this should make the seam as little visible at the front of the trousers as possible).

I serged both seam allowances and sewed each leg together.

The back seam allowances will be serged together and pressed to the back.

Then I sewed the center seam. It should be sewed twice at the same place, because it's the most stressed part of the trousers.
I hemmed the length of the legs and prepared a tunnel (cut separately). It's made of two pieces, I didn't sew the whole center front seam but left a slit there for the elastic band.
I sewed a little rectangle around the hole for the allowances to lay flat.

I sewed the tunnel piece to the waistline. I pressed the allowances up and the upper edge down at the same time.

I folded this piece down to the wrong side and sewed its lower edge to the trousers. I added the elastic band and..

..this is it. I'm happy because the gore is not very noticeable. The shadow behind is the other pair (trousers No. 3 :-D).

Monday, 5 April 2010

Cranach Dress - Petticoat's Neckline

I sewed five stripes together to form the same shape as the neckline is.
I pinned it on the dress right side to right side and sewed on a cm from the edge.

The band has vlieselin ironed on to support the neckline well.
I tried to change the direction exactly at the top's seams and you can see that I pressed the band's seam allowances to lay on the other side than the top's ones.

The petticoat finished for the moment.

I also tried to make a pattern for the upper dress from the scraps. Sis was excited :-)

I wasn't. It quite fitted. But after a few days I looked at the photo and found out it's very similar to the ones of cranach reconstruction I've seen a few so far. The unsuccessful ones in my eyes.
So I'm going to make another pattern and possibly widen the petticoat's neckline (but definitely not before I have a pattern for the coat:-) ).