
Friday, 13 August 2010
Thursday, 12 August 2010
Red-Black Costume - Surcoat
The waistcoat part of the costume:-)
I took the pattern from the st. Wenceslas' tunic.

I sewed the shouler and side seam leaving slits at the lower edge.
I serged the shoulder seams and the side ones without the slit.

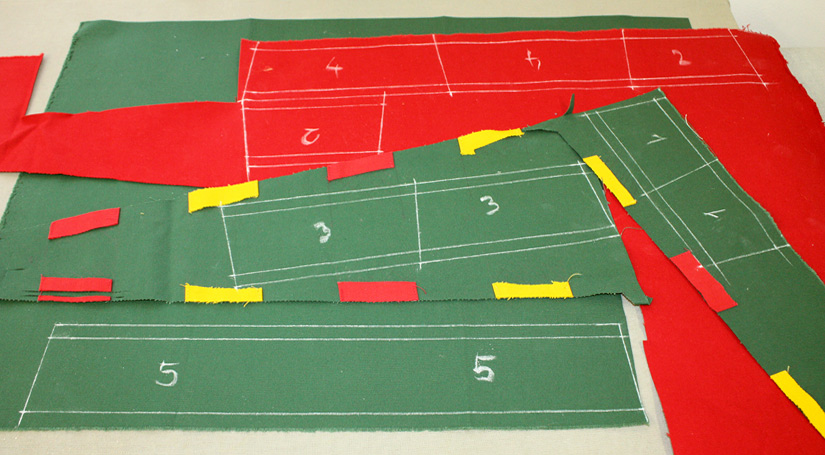
I traced the armhole shapes on the red canvas, traced the position of the shoulder and side seam and added the seam allowances.

I sewed the hemming pieces together and ironed half a cm of the outer edges to the wrong side.

I sewed on the hemming pieces at the armholes. I laid them right side to the wrong side of the waistcoat and sewed on at half a cm.
I turned them to the right side and ironed leaving a little red strip at the wrong side so that the seam couldn't be visible at the right side.
A little tailor's trick:)
Then I sewed the hems on at the outer edge.

I aligned the lower hem lining with the slit on the tunic so that both slits begin at the same point. Right side of the lining to the wrong side of the tunic, I sewed on one half of the lining from one slit to the other.

I cut the seam allowances to the last stitch of the line and turned the lining over to sew the other half in the same way as the first one.

I sewed on the hem in the inner edge. I had to cut the corners to fold the seam allowance properly.

I folded in the cut seam allowances and sewed on in hand.

I took the pattern from the st. Wenceslas' tunic.

I sewed the shouler and side seam leaving slits at the lower edge.
I serged the shoulder seams and the side ones without the slit.

I traced the armhole shapes on the red canvas, traced the position of the shoulder and side seam and added the seam allowances.

I sewed the hemming pieces together and ironed half a cm of the outer edges to the wrong side.

I sewed on the hemming pieces at the armholes. I laid them right side to the wrong side of the waistcoat and sewed on at half a cm.
I turned them to the right side and ironed leaving a little red strip at the wrong side so that the seam couldn't be visible at the right side.
A little tailor's trick:)
Then I sewed the hems on at the outer edge.

I aligned the lower hem lining with the slit on the tunic so that both slits begin at the same point. Right side of the lining to the wrong side of the tunic, I sewed on one half of the lining from one slit to the other.

I cut the seam allowances to the last stitch of the line and turned the lining over to sew the other half in the same way as the first one.

I sewed on the hem in the inner edge. I had to cut the corners to fold the seam allowance properly.

I folded in the cut seam allowances and sewed on in hand.

Red-Black Costume - Hood
I wanted to make something easy, that I could sell at larp battles. And from canvas, not velvet:-D
Well, I bought some black and red cotton canvas and here we go.
I cut out the pattern. Once from each colour.
I added gores to the shoulder slits and sewed the center-front and center-back seams.

I could press the seam allowances but I had to trim them at the curves.

I sewed the two hoods together at the lower edge. I sewed right side to right side.
I also sewed the seam allowances at the tip of the liripipe together. For easy changing of the colour of the hood:-)

I folded a cm at the face edges in and ironed.

I basted the edges and sewed together at two milimeters from the edge. I ironed the lower hem and sewed this way as well.

That's all:-)
Well, I bought some black and red cotton canvas and here we go.
I cut out the pattern. Once from each colour.
I added gores to the shoulder slits and sewed the center-front and center-back seams.

I could press the seam allowances but I had to trim them at the curves.

I sewed the two hoods together at the lower edge. I sewed right side to right side.
I also sewed the seam allowances at the tip of the liripipe together. For easy changing of the colour of the hood:-)

I folded a cm at the face edges in and ironed.

I basted the edges and sewed together at two milimeters from the edge. I ironed the lower hem and sewed this way as well.

That's all:-)
Thursday, 29 July 2010
Microphone Poi
I wanted to have LED poi. Or some kind of glow poi.
Father gave me these shining microphones that blink when on. I broke out the sound button at first:-)

I cut out two pieces - one for the body and the mesh for the bulb.
I made a cylinder from the rectangle and gathered the circle on one side of it.

I didn't make a usual grommet eyelet. I folded the cylinder several times and sewed in one single point. I hooked the loop around it so that the lower part was hidden inside.

The longer side of the rectangle is not fully sewn, there's a gap to insert the microphone. I put it in and fastened the body at several places with a rubber cord.

Let's go spinning :-)

And see how lovely the light circles are!

Father gave me these shining microphones that blink when on. I broke out the sound button at first:-)

I cut out two pieces - one for the body and the mesh for the bulb.
I made a cylinder from the rectangle and gathered the circle on one side of it.

I didn't make a usual grommet eyelet. I folded the cylinder several times and sewed in one single point. I hooked the loop around it so that the lower part was hidden inside.

The longer side of the rectangle is not fully sewn, there's a gap to insert the microphone. I put it in and fastened the body at several places with a rubber cord.

Let's go spinning :-)

And see how lovely the light circles are!

Wednesday, 28 July 2010
Cranach Dress - Sleeve Tubes
I measured the girth at several places of sister's arm and cut out these horizontal parts of the sleeve.

The vertical stripes are made as tubes.
Here you can see how I found out how to sew the unpleasant velvet with satisfying results.
You put it on the table right sides together. You move the finger on the surface like a sewing machine foot. You just watch the way it reacts.

Here the upper layer moved three milimeters to the left. When sewing you just shift it three milimeters to the right:-) This way you may not end up mad from this ever sliding fabric..

I got quite a lot of tubes. I sorted them out according to the desired lenghts of each part of the sleeve.

I turned the tubes over and pressed flat.

I cut them with my patchwork rotary cutter.

How lovely! <3

I joined each vertical part of the sleeve with the overlock stitch.

That's the only way to handle all this tubes reasonably:-) And to be sure not to have a tube upside down (the velvet changes its colour when not laid the same direction).


The vertical stripes are made as tubes.
Here you can see how I found out how to sew the unpleasant velvet with satisfying results.
You put it on the table right sides together. You move the finger on the surface like a sewing machine foot. You just watch the way it reacts.

Here the upper layer moved three milimeters to the left. When sewing you just shift it three milimeters to the right:-) This way you may not end up mad from this ever sliding fabric..

I got quite a lot of tubes. I sorted them out according to the desired lenghts of each part of the sleeve.

I turned the tubes over and pressed flat.

I cut them with my patchwork rotary cutter.

How lovely! <3

I joined each vertical part of the sleeve with the overlock stitch.

That's the only way to handle all this tubes reasonably:-) And to be sure not to have a tube upside down (the velvet changes its colour when not laid the same direction).

Yellow Rasta Poi
The last pair of poi doesn't differ so much from the others, so there are just a few pics.

At the stripes I tried to use as much of the leftovers of the previous poi as possible.
Made the poi the usual way.

My client wanted me to make the grommets more tough. I cut out washers from the leather and glued them on with a quality glue. The glue made the eyehole more stiff. It should endure very fast spinning now:)

The last rasta pair with its sack.

At the stripes I tried to use as much of the leftovers of the previous poi as possible.
Made the poi the usual way.

My client wanted me to make the grommets more tough. I cut out washers from the leather and glued them on with a quality glue. The glue made the eyehole more stiff. It should endure very fast spinning now:)

The last rasta pair with its sack.

Tuesday, 20 July 2010
Cranach Dress - Skirt's Panels
Today I'm just adding a few pics about the progress.

When I had all the double panels sewn, I took each two of them and put them together to get four joined panels.
These sewn together by two gave me eight panel pieces - fourths of the skirt.

And so on. This is half the skirt. I'm pleased that the golden bands look like continuous rings.
Unfortunately, sister didn't buy all the velvet at once. She bought a half and next time the rest so she accidentaly didn't buy exactly the same hue. Each half of the skirt will be of a slightly different colour.

Basting the hem. Quite a long one:-)


When I had all the double panels sewn, I took each two of them and put them together to get four joined panels.
These sewn together by two gave me eight panel pieces - fourths of the skirt.

And so on. This is half the skirt. I'm pleased that the golden bands look like continuous rings.
Unfortunately, sister didn't buy all the velvet at once. She bought a half and next time the rest so she accidentaly didn't buy exactly the same hue. Each half of the skirt will be of a slightly different colour.

Basting the hem. Quite a long one:-)

Thursday, 15 July 2010
Cranach Dress - Skirt's Getting Together
I'm getting the skirt together today.
The velvet's tricky and the brocade bands must fit perfectly to look like three continuous rings.
I pinned each two panels at the top, bottom and at the bands.
I added more pins and basted the seam.
When you lay two layers of velvet right sides in and press with a finger, you can see a layer moved in one direction. When basting, I just moved it two milimeters in the opposite direction.

This way I got quite a satisfactory result. I started to join each two panels together.

The velvet's tricky and the brocade bands must fit perfectly to look like three continuous rings.
I pinned each two panels at the top, bottom and at the bands.
I added more pins and basted the seam.
When you lay two layers of velvet right sides in and press with a finger, you can see a layer moved in one direction. When basting, I just moved it two milimeters in the opposite direction.

This way I got quite a satisfactory result. I started to join each two panels together.

Cranach Dress - Skirt's Panels
Sister's order for a Cranach dress. She overestimates me :-) She could have chosen another dress than the most difficult one of the period...
I made a pattern according to Mrs. Kybalová's book.

I measured the height from the waistline to the ground. I added a few centimeters as a technological supplement, as the skirt won't hang exactly vertically (the sticked lower part:-D).

I cut the skirt panels all in one direction. I marked the lower and upper egde and the posititon of the decorations.
The decorative bands were cut in a row. Their long edges ironed down to the wrong side.

I meant to edit the pattern so that I could sew on straight bands. However, I found out I could quite easily arrange them in an arc.
First I pinned the sides of the band to the marked place. Then I stretched the center downwards and pinned it. I added two more pins and could start to sew on. Repeat ninety-five times. (According to the book, the skirt consists from thirty-two panels.)

The golden brocade was quite tough and made the velvet wrinkle. Most of this could be undone with the help of the iron.

I serged the long sides.
Thirty-two prepared panels:-)

By the way, don't get mistaken by the date, the whole process took several days..
I made a pattern according to Mrs. Kybalová's book.

I measured the height from the waistline to the ground. I added a few centimeters as a technological supplement, as the skirt won't hang exactly vertically (the sticked lower part:-D).

I cut the skirt panels all in one direction. I marked the lower and upper egde and the posititon of the decorations.
The decorative bands were cut in a row. Their long edges ironed down to the wrong side.

I meant to edit the pattern so that I could sew on straight bands. However, I found out I could quite easily arrange them in an arc.
First I pinned the sides of the band to the marked place. Then I stretched the center downwards and pinned it. I added two more pins and could start to sew on. Repeat ninety-five times. (According to the book, the skirt consists from thirty-two panels.)

The golden brocade was quite tough and made the velvet wrinkle. Most of this could be undone with the help of the iron.

I serged the long sides.
Thirty-two prepared panels:-)

By the way, don't get mistaken by the date, the whole process took several days..
Tuesday, 13 July 2010
Kiwido - The Final Touch
My kiwido poi are completed now.
I sewed ten spangles to each quarter, each with just two stitches.
I'm sending them today and wishing them joyful and long life:-)

I sewed ten spangles to each quarter, each with just two stitches.
I'm sending them today and wishing them joyful and long life:-)

Subscribe to:
Posts (Atom)